
Lesson aims:
To practise body part vocabulary and guessing phrases – e.g. “I think it’s a nose.” and “It could be a finger.”
Quick description: The lesson begins with a warmer game of guess the body part. Students then try to list as many body parts as they can. Sharing and comparing with neighbours they expand their vocabulary. The class is then divided into two teams, with each team attempting to list, then label the most body parts on a giant outline of a body. (Note: all images used are royalty free – from Pexels.com)
Sub-aims: practise using the correct indefinite article (“a” or “an”)
Teaching Materials / requirements:
• Power point presentation
• slips of paper (for body part lists)
• A projector
• A white board (or blackboard) onto which a body outline can be drawn and labelled
• two different coloured whiteboard markers (or chalks) – this plan uses blue and green.
• Optional: masking tape (to draw a ‘do not cross’ line)
DOWNLOAD LINKS: word doc of lesson plan powerpoint template
Preparation:
- If no white board is available, consider preparing a body outline on sheets of clear plastic (see Tips: Useful materials page) that can be stuck up on a side wall
Assumed knowledge:
Students will already have been introduced to body parts in the past, but may have forgotten some/all of this.
Anticipated problems > solutions:
- Technology fail > solution > if there is a risk of technology fail, the images in the body part guessing game could be printed out as colour worksheets to be shared in groups.
- The body-labelling segment of the game can get chaotic as the class gets excited/competetive > solution > ensure rules are set clearly before the game and create a ‘do not cross’ line, beyond which only one team member is allowed at any one time.
Lesson plan and rationale:
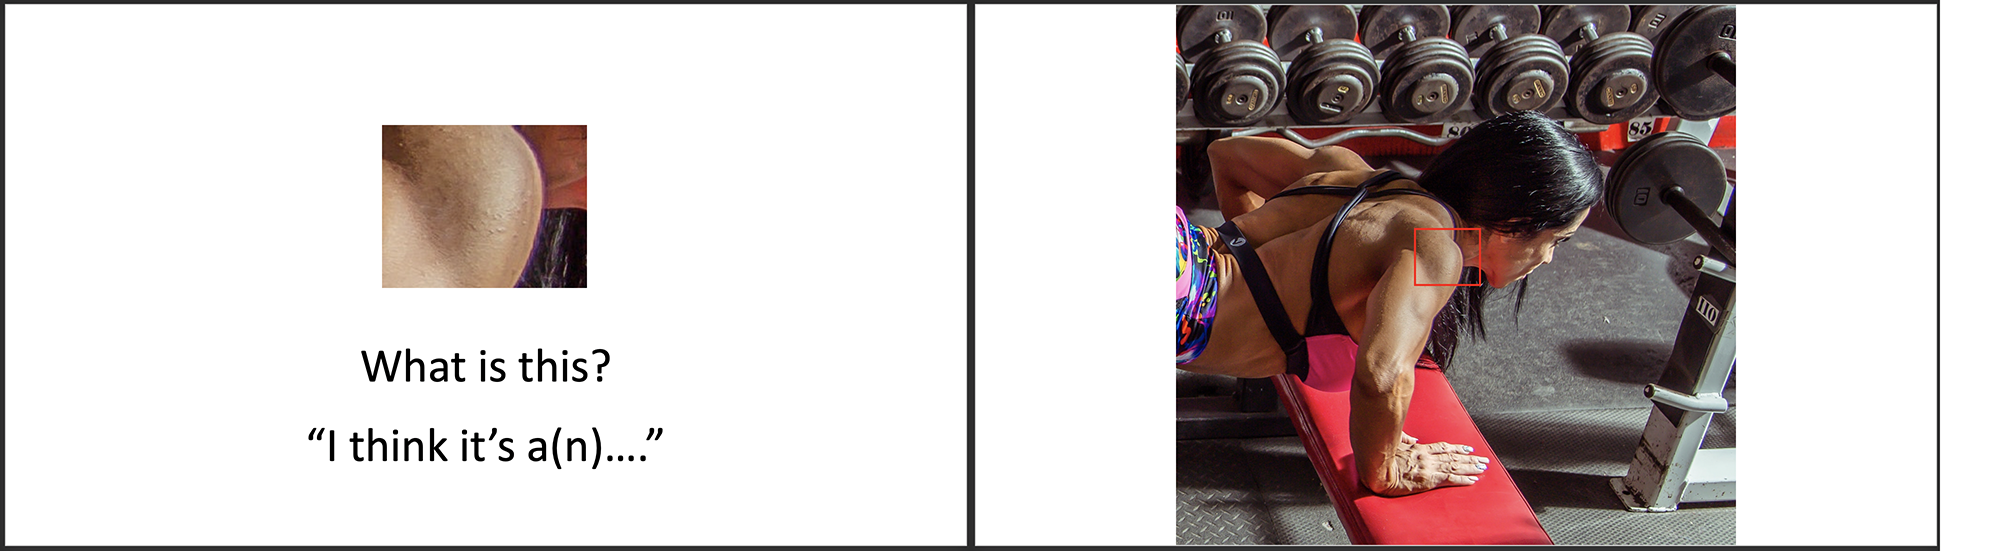
1. Without revealing the theme of the lesson, put up the first slide (showing an extreme close-up of a shoulder) and ask them “What is this?”. Ask for suggestions, encourage the use of a full sentence starting “I think it’s a(n)…”. If you get a quick correct guess, let the guessing continue so that the class can practice speaking a little.
Rationale: Builds interest in the lesson and warms up the class. A good opportunity to practise the correct use of ‘a’ and ‘an’
.
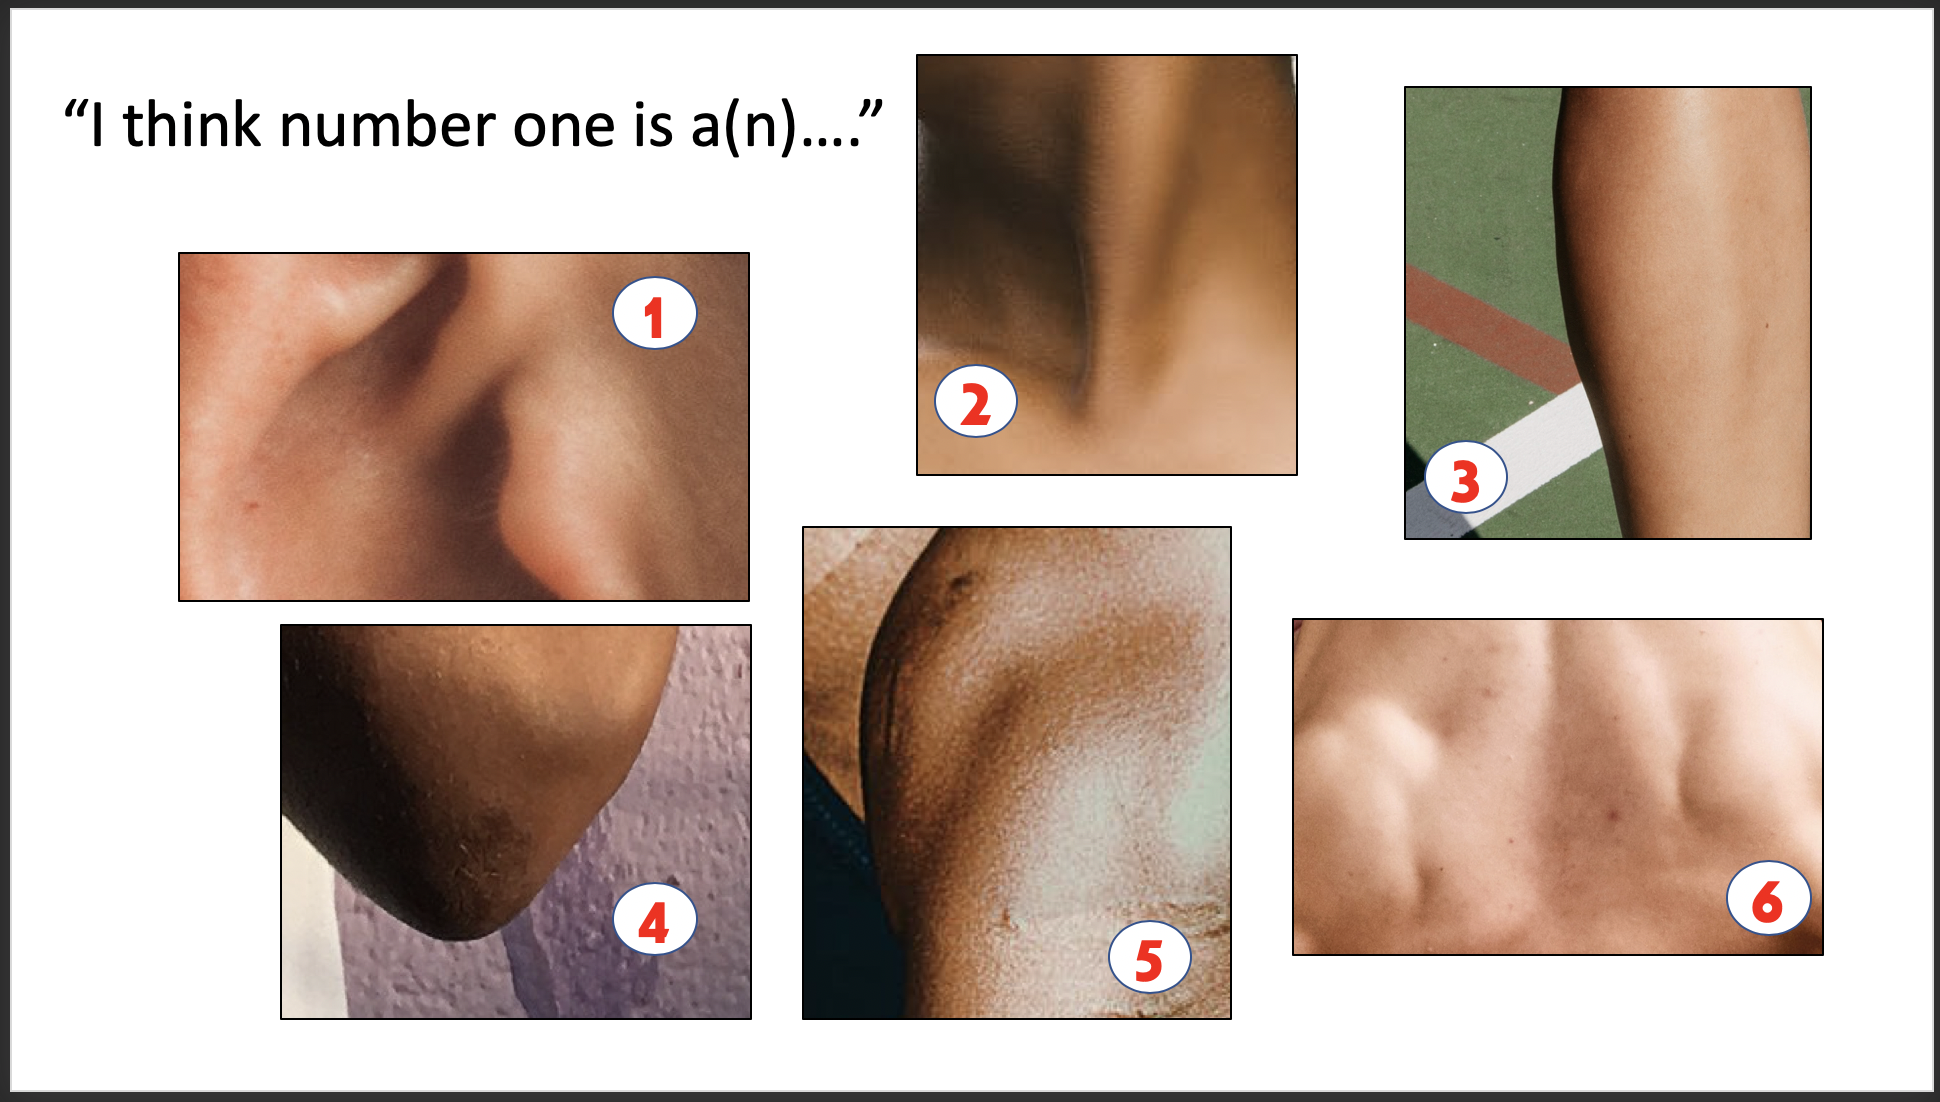
2. Reveal the correct answer. Tell the class you will be talking about body parts. Show the next slide and instruct the class to identify the pictures. Students should work in pairs and talk in English, using example phrases such as: “I think number one is a hand.” / “I agree.” / “No, I think it’s a foot.”
Rationale: Gives students some speaking practice. By working in. pairs allows students to share knowledge of body parts and strengthen each other’s vocabulary .
.
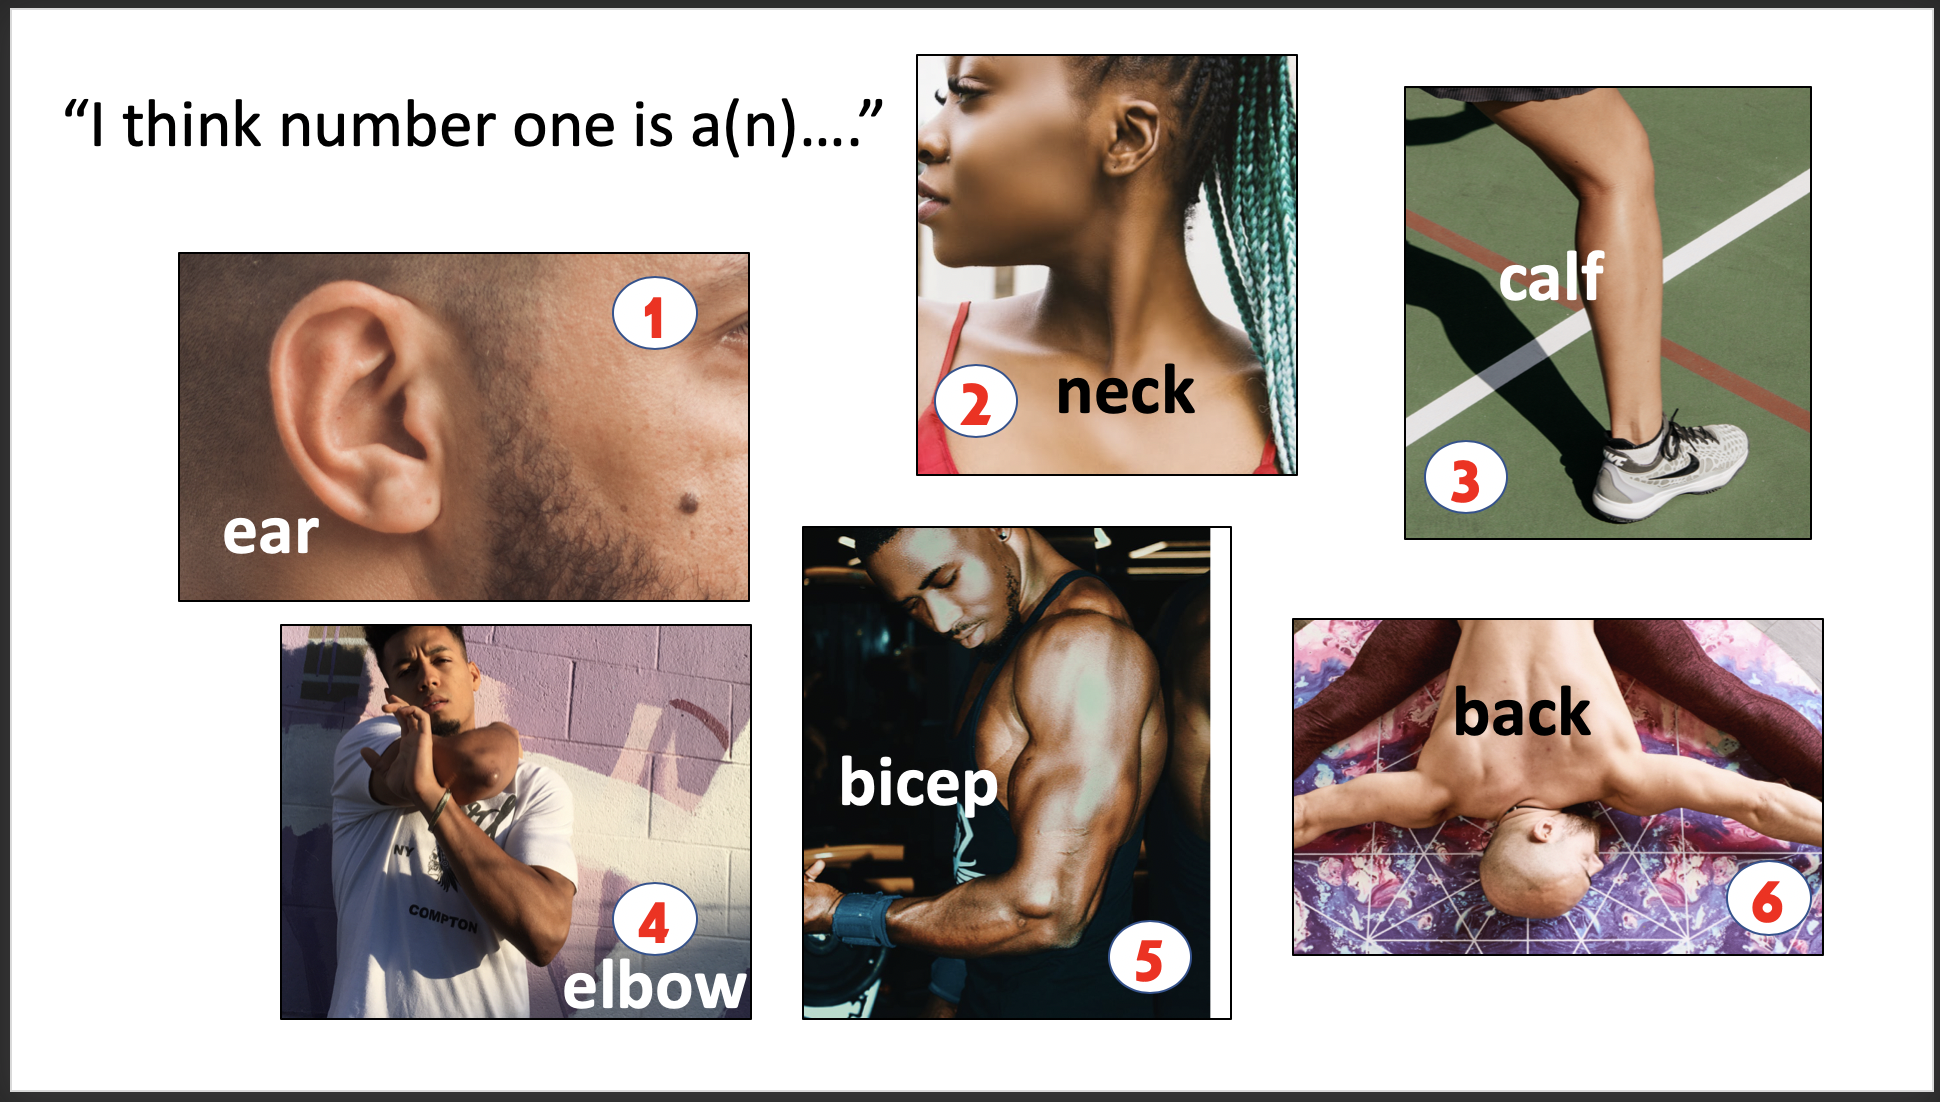
3. When most of the class have finished ask them to compare their ideas with their neighbouring pairs. Then take feedback as a class. Insist on full sentences (e.g.” I think number 1 is….”). Put all answers to the group with a “Do you agree?” Reveal the correct answers.
Rationale: Allowing students to check with neighbours builds confidence before class feedback. Class feedback helps drill “I think…” opinions and “Do you agree?” confirmation statements.
.
4. Next ask each student to list as many body parts as possible. (Consider handing out slips of paper to encourage participation).Make it a competition: set a ‘time limit’ of 5 minutes (although this can be extended quietly to allow students more time). Go around the room checking lists. After 5 minutes, ask how many each student has. Ask students to compare with their neighbours.
Rationale: Allowing students to check with neighbours builds confidence before class feedback and strengthens all students vocabulary before the next labelling exercise. .
5. Take class feedback. Ask students who has the most and get that student to read out their list. Write each word on the board. Concept check by asking a student to “Point to your elbow, please.” Once the list is complete ask for any extra body parts that haven’t been listed yet. NOTE: highlight singular/plural of foot/feet and tooth/teeth.
Rationale: Consolidates body part language. Allows students to see correct spelling and to visualise words (important for more visual learners) .
6. Next go around the class giving each student a letter A or B. Put a ‘do not cross’ line of masking tape on the floor, one metre from the whiteboard. Ask A’s to stand up then form a line facing the board. Do the same with B’s. Show the diagram on the powerpoint slide. Point to the board and its equivalent on the diagram.Point to the coloured dots then to students in that team to indicate the dots represent students “You are team A. You are Blue.” hold up the blue whiteboard marker. Repeat with team B and Green. Point to the ‘do not cross’ line. Explain only one student is allowed in front of this line. Students must label the body outline with one part of the body, then pass the pen to the next teammate and return to the back of the queue. There can be no repetition of body parts. Any cheating (rubbing out competitors answers) is a 1 point penalty.
Rationale: The competitive nature of the game encourages teammates to help each other and learn vocabulary.
.
6. Progress to next slide of body outline (or draw your own). The game ends when no more guesses can be added. The class returns to its seats and the body parts are checked and corrected where necessary. The tally is totted up and a winning team is declared. NOTE: the unusual stance adopted in the outline drawing is to allow students to identify and label the persons back / bottom. Also – depending on the students, it’s possible someone will try to label the groin area using inappropriate language. Discuss with your teacher how you should deal with this and prepare your response in advance.
.
7. The lesson can continue with a practical exercise from the workbook or, working on verbs such as stand, put, touch, sit, lie, face down, face up, turn (90 degree). etc This can then lead on to an exercise about describing yoga positions/ reproducing poses from famous painting etc..
